Setup and Manage Proxy Access
Proxy access gives you the ability to provide trusted people access to certain parts of your account. Accessible areas can include grades, billing, and making payments on your behalf. Each proxy can be configured uniquely and has access to one or more areas of your account. Access should only be given to people you trust and who will treat your information with confidentiality.
You may complete the Proxy Information Form found in the MyUNOH Portal to have new proxies added to your account. The information below will walk you through the steps of configuring a proxy account.
Setup Proxy Access
Login to the UNOH Self-Service website and select View/Add Proxy Access from your account image in the top right. Alternatively, you may access it directly by clicking here.
Add a Proxy
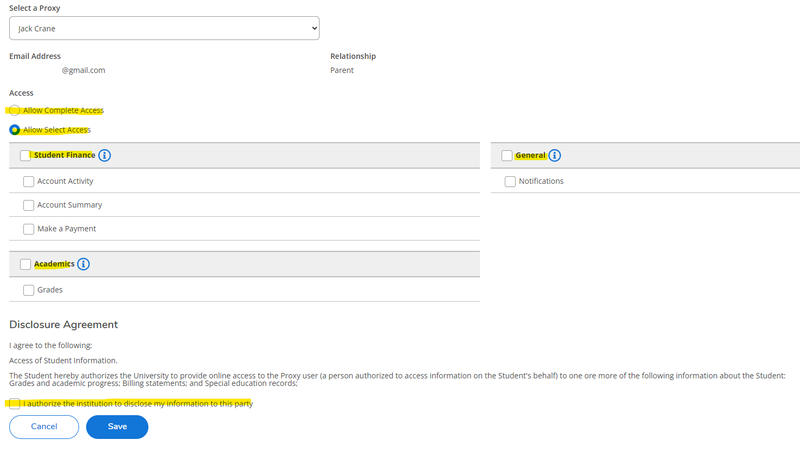
Choose a proxy from the list. If there are no options for you to choose from or you would like to have a new proxy added, please complete the Proxy Information Form found in the MyUNOH Portal forms area.

Configure Access
Choose the areas your proxy has access to view information or perform actions (such as make a payment).

Note the email address under your proxy's name, this is the email address where they will receive all communications regarding their proxy access including username and temporary password. If this is incorrect, please contact our offices to have the information updated.
You must also accept the disclosure agreement before continuing. Click Save when you have completed the proxy access permissions.
Communicate with your Proxy
Once you have configured proxy access for the first time your Proxy will receive two emails, one email will include their username, and the second email will contain a temporary password. Ask them to follow the instructions sent to their email which will help them create the account and configure their password.
Manage Proxy Permissions
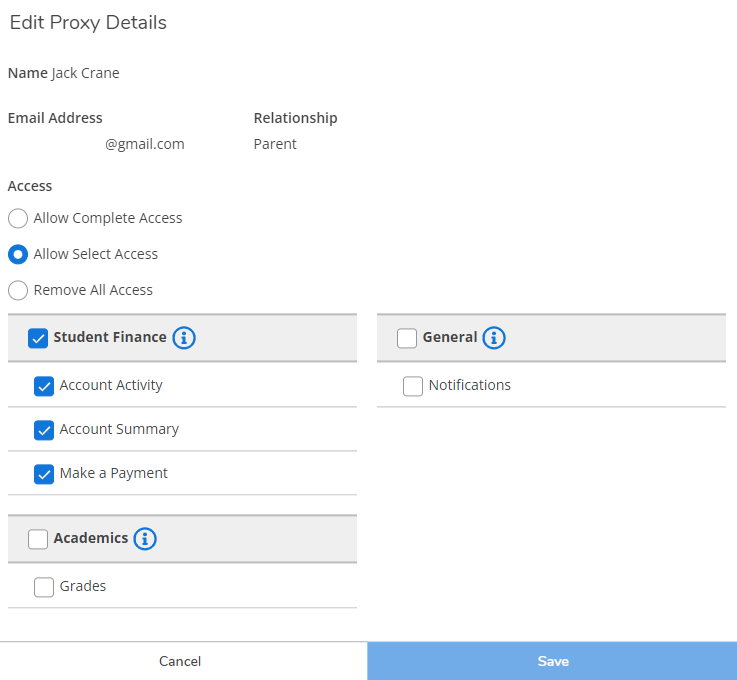
You can modify your proxy's access at any time. Under the Active Proxies section, you will see each person who has access to your accounts and the areas in which they have access. You can update this at any time by clicking on the edit button.

Update the areas in which you would like to provide access to and click on Save. Your proxy will be notified that a change has been made to their account.


